Roof shingles are a popular choice for roofing, but can get damaged over time from weather, age, or other factors.
Prompt repair is crucial to prevent further damage to your home. Whether you’re looking to handle a DIY fix or need Roofing repair in Norman OK, Roofing repair in Choctaw OK, roofing and repair Del City, or roof repair Yukon ok, it’s important to act quickly if you’re dealing with damage or planning a roof insurance claim.
In this guide, we’ll walk you through the steps for safely and efficiently repairing roof shingles to maintain your roof’s integrity.
How to Repair Roof Shingles?
To repair roof shingles, lift the damaged shingles, apply roofing cement underneath, and secure the new asphalt shingles with nails. Seal the edges to prevent water penetration and replace the nails.
Key Takeaways
- Roof shingles can be damaged by weather, age, or improper installation, leading to leaks and other issues.
- Identifying the type of damage is the first step in determining how to repair your roof shingles.
- Some roof shingle repairs can be done by homeowners, while others require professional assistance.
Understanding Roof Shingle Damage

Before starting a roof shingle repair, it’s important to understand the different types of damage that can occur.
Roof shingles are one of the most common types of roofing material used across homes, but over time, they can become damaged due to weather, age, or other factors.
When shingles are damaged, it’s essential to repair them promptly to prevent further damage to your roof and the rest of your home.
We’ll explore how to repair roof shingles efficiently and safely.
Roof shingles can be subject to various types of wear and tear, including cracking, curling, tearing, or losing granules.
Each type of damage may require a slightly different approach to repair.
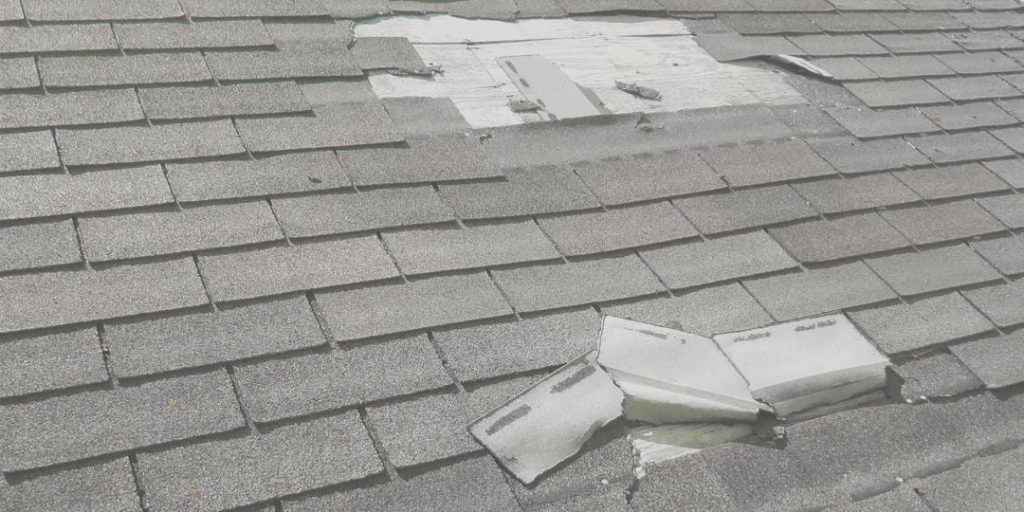
Common Types of Roof Shingle Damage
Cracked or Broken Shingles: Cracks can form due to wind, falling debris, or temperature fluctuations. Broken shingles leave your roof vulnerable to leaks.
Curled Shingles: If the edges of shingles curl upward, they can be a sign of age, moisture, or improper ventilation.
Torn or Missing Shingles: Torn shingles or shingles that are completely missing need to be replaced promptly to avoid water infiltration.
Granule Loss: Granules on shingles are important for UV protection. Loss of granules often signals that the shingles are nearing the end of their life.
Once you know the type of damage, you can choose the appropriate repair method.
Tools You’ll Need for Roof Shingle Repair

Before you start, make sure you have the necessary tools to safely and effectively repair your roof shingles. Here’s a list of items you’ll likely need for the job:
- Replacement shingles (matching the existing ones)
- Hammer
- Roofing nails
- Roofing cement or sealant
- Pry bar
- Utility knife
- Ladder
- Work gloves
Safety should always be a priority, so ensure you have the proper safety gear, including a sturdy ladder and non-slip shoes.
Step-by-Step Instructions for Repairing Roof Shingles

Step 1: Safety First
Before attempting any repairs, ensure the area is safe. Use a sturdy ladder and avoid working in harsh weather conditions.
It’s essential to check that the roof is dry and that there are no strong winds or rain, as these can make the work more dangerous.
Step 2: Inspect the Damaged Shingles
Once you’re safely on the roof, identify the damaged shingles. Inspect each one for cracks, curling, or missing sections. Take note of which shingles need repair or replacement.
Step 3: Remove the Damaged Shingle
To replace a damaged shingle, start by removing the old one. Use the pry bar to gently lift the shingle and break the nails that hold it in place.
Be careful not to damage the surrounding shingles while removing the damaged ones.
If the shingle is torn or cracked but not fully removed, it may be possible to patch it rather than replace it entirely.
In this case, apply roofing cement to the crack and smooth it down with a putty knife.
Step 4: Install the New Shingle
For replacing a shingle, slide the new shingle into place, ensuring that it fits properly. Align the edges with the adjacent shingles to maintain a uniform appearance.
Nail the new shingle into place using roofing nails, making sure not to nail through the top edge to prevent water infiltration.
If the shingle is damaged in the middle, apply roofing cement and smooth it down.
If you’re installing a full replacement shingle, ensure it overlaps the shingles below it correctly for water resistance.
Step 5: Seal the Shingle
After the new shingle is in place, use roofing cement to seal the edges. This will help prevent future damage and leaks.
Use a putty knife to apply the cement evenly along the edges of the shingle to create a secure seal.
Step 6: Inspect the Repair
Once the shingle is installed and sealed, inspect your work to ensure it’s properly aligned and secure.
Check that there are no gaps, and make sure the shingle is firmly in place. You can gently tap on it with a hammer to make sure it’s tightly sealed.
Step 7: Clean Up
After completing the repair, clear any leftover debris or materials from the roof. Ensure that any tools or roofing nails are collected, and safely descend from the roof.
When to Call a Professional

While small roof shingle repairs can often be handled by homeowners, there are times when it’s better to call in a professional.
If the damage to your roof is extensive or affects multiple shingles, attempting a repair without the right tools or knowledge can lead to further issues.
Additionally, if you’re unsure about your ability to safely make the repair, it’s always safer to hire a professional.
Roofing repairs can be risky, especially if you need to work at heights or are dealing with severe weather damage.
A professional roofing contractor is equipped with the right safety gear and experience to work efficiently and safely.
In cases of significant damage or widespread issues, hiring a contractor ensures that repairs are made to the highest standard, reducing the risk of recurring problems.
Another reason to call a professional is when the underlying issues go beyond the surface damage.
If there are concerns about water infiltration, structural damage, or poor roof installation, a professional will be able to assess the entire roofing system and make necessary repairs to prevent more serious issues down the road.
Moreover, roofing contractors have the specialized tools and materials needed to perform repairs quickly and efficiently.
This is particularly important for larger repairs that may require custom materials or advanced techniques, which are often outside the scope of DIY fixes.
In summary, if the damage is extensive, affects multiple shingles, or involves structural issues, it’s best to call a professional.
They will have the expertise, tools, and safety equipment to ensure your roof is properly repaired and functioning well, preventing future issues and costly repairs.
1. Preventing Future Roof Shingle Damage
Once you’ve repaired your roof, it’s essential to take steps to prevent future damage.
Regular roof maintenance can extend the lifespan of your shingles and prevent small issues from escalating into more significant problems.
2. Regular Inspections
Check your roof at least once a year for signs of damage. Look for cracked, missing, or curled shingles.
Early detection allows you to address issues before they cause water damage.
3. Clean Gutters and Downspouts
Clogged gutters and downspouts can cause water to back up on your roof, leading to damage over time.
Clean your gutters regularly to ensure water flows away from your roof properly.
4. Address Ventilation Issues
Poor ventilation can cause shingles to age prematurely, as heat and moisture build-up underneath them.
Ensure your attic has adequate ventilation to prevent damage from excessive heat.
Frequently Asked Questions
1. How do I know if my roof shingles need to be replaced?
Signs that your shingles need replacing include cracking, curling, missing shingles, or granule loss. If you notice these issues, it may be time to consider a full roof replacement.
2. Can I repair roof shingles myself?
Yes, minor repairs like replacing damaged shingles or sealing cracks can be done by homeowners with the right tools. However, for extensive damage or safety concerns, it’s advisable to call a professional.
3. How much does it cost to repair roof shingles?
The cost of repairing roof shingles varies depending on the extent of the damage. Minor repairs may cost a few hundred dollars, while extensive repairs or replacements can run into the thousands.
Conclusion
Repairing roof shingles is an essential part of home maintenance.
Whether you have a few damaged shingles or a more significant problem, addressing roof issues promptly can prevent further damage and protect your home.
By following the steps outlined above and performing regular inspections, you can keep your roof in good shape for years to come.
If you’re not comfortable handling the repairs yourself, don’t hesitate to call a professional to ensure the job is done safely and effectively.
Proper roof maintenance is a small investment that can save you money in the long run by avoiding costly repairs.